nginx⚓︎
In order to integrate the WebClient onto an nginx server, it is first necessary to enter all of the relevant settings:
Document directory⚓︎
The folder from which the WebClient should be operated is entered here. The default folder is /var/www/html.
SSL certificate path⚓︎
It is necessary to enter the directory in which the certificate will be saved here. The standard path here is /etc/nginx/certs/webclient.crt.
SSL certificate key path⚓︎
Finally, it is necessary to enter where the certificate key is located here. The default setting is /etc/nginx/certs/webclient.key.
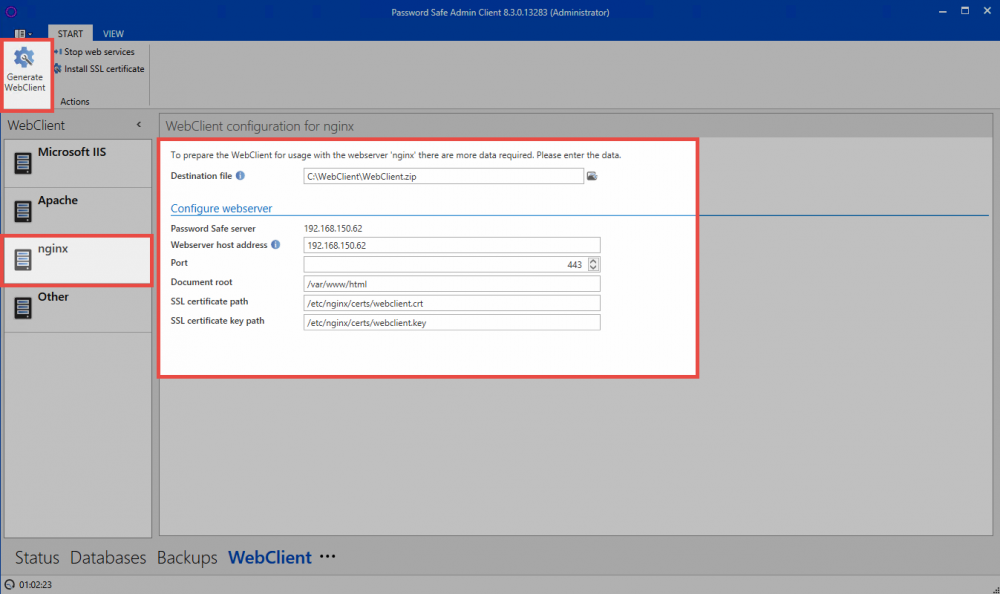
Once all of the settings have been entered, the WebClient can be created via the button in the ribbon. The folder in which the ZIP file is located will then immediately open. The archive is unzipped and its contents are copied to the document directory on the web server.
The configuration for the nginx server was also created together with the ZIP file. This can be directly viewed on the AdminClient.
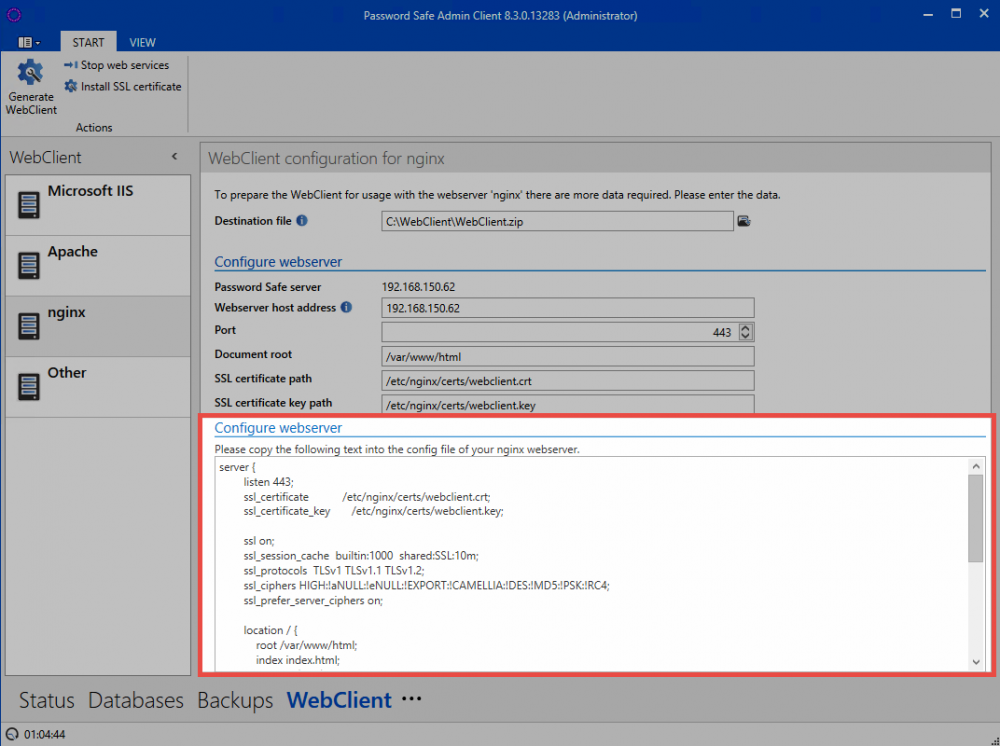
The configuration then still needs to be integrated onto the nginx server. It can be directly copied on the AdminClient for this purpose.
Hint
Every web server configuration is individual. Therefore, it is only possible to outline the normal process for a standard installation.
Standard configuration⚓︎
The file /etc/nginx/sites-available/default is firstly opened. For example via "nano". Now search for the entry server { }. The configuration for the AdminClient is then added. Finally, the web server is restarted using the command systemctl restart nginx.
The WebClient is now ready to use and can be directly started.
Created: 2022-09-05