Forms⚓︎
What are forms?⚓︎
When creating a new data record, it is always indispensable to query all relevant data for the intended application. In this context, Forms represent templates for the information which have to be stored. The manageability of existing forms primarily ensures the completeness of the data which have to be stored. Nevertheless, their use as an effective filter criterion is not to be ignored! Forms have a lasting impact on working with Password Secure v8 and must be managed and maintained with the necessary care by the administration.

Relevant rights⚓︎
The following options are required to add new forms.
User right⚓︎
- Can add new forms
- Display form module
Standard forms⚓︎
Password Secure is supplied with a series of standard forms – these should generally cover all standard requirements. Naturally, it is still possible to adapt the standard forms to your individual requirements.
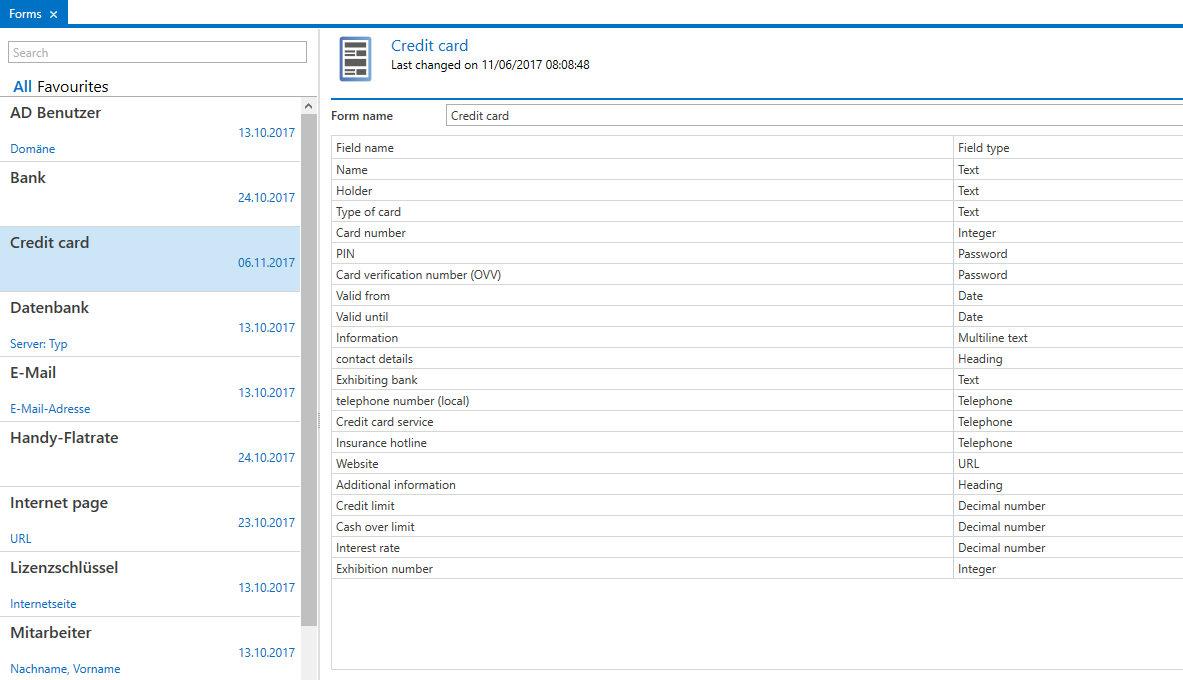
The associated preview for the form selected in list view appears in the reading pane. Both the field name and also the field type are visible.
Creating new forms⚓︎
The wizard for creating new forms can be started via the ribbon, the keyboard shortcut "Ctrl + N" or also the context menu that is accessed using the right mouse button. The same mechanisms can now be used to create new form fields within the wizard. Depending on the selected field type, other options are available in the field settings section. This will be clearly explained below using the example of the field type "Password". The sequence in which form fields are requested when creating new records corresponds to the sequence within the form. This can be adapted using the relevant buttons in the ribbon.
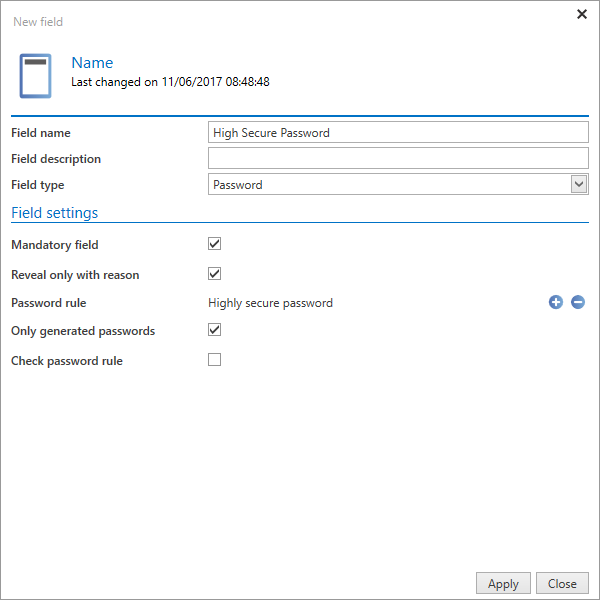
The following field settings thus appear for the field type "Password": "Mandatory field, reveal only with reason, check only generated passwords and password policy". These can now be defined as desired. (Note: It is possible to select password rules within the field settings; they are defined as part of the options in the main menu)
Be Aware
If a form has been created, it can then be selected for use when creating new records. The prerequisite is that the logged-in user has at least read rights to the form.
Permissions for forms⚓︎
In the same way as for other objects (records, roles, documents,…), permissions can also be granted for forms. On the one hand, this ensures that not everyone can edit existing forms, while on the other hand, it allows you to make forms available to selective groups. This ensures that clarity is maintained and that users are not confronted with information that is irrelevant to them. The form "Credit cards" may be relevant within the accounting department but administrators do not generally need to use it.
Configuring the info field⚓︎
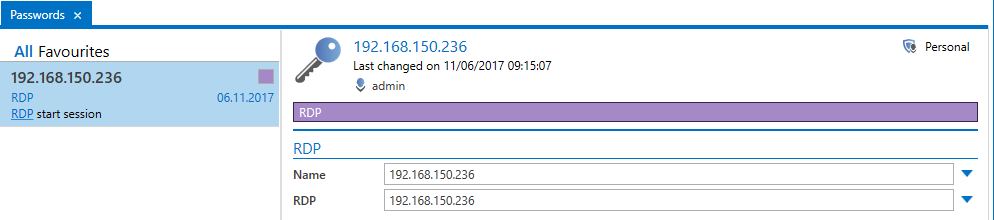
Every record displays other information underneath the obligatory name of the record in list view. In the following example, the user name is also displayed in addition to the name of the password. The name of the form is displayed in between in a blue font.
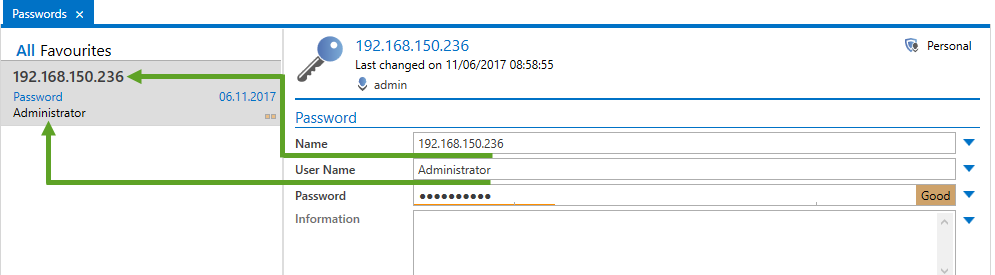
The name of the record (192.168.150.236) and the form (password) cannot be adjusted – these are always displayed. The user (Administrator) that is still saved for the record is currently displayed. This can be configured in the info field for the form. It is thus possible to separately define for each form what information for a record can be directly seen in list view. In the form module, the info field is configured by opening the form which has to be edited in editing mode by double clicking on it and then pressing the *Configure info field” button in the ribbon.

This will open a separate tab that enables you to design the info section via drag & drop. The fields that are available on the right can be "dragged" onto the configuration window on the left. In the following example, "Start RDP session2 will be made visible in the info section, whereby only the word "RDP" is assigned a function – namely to start the RDP manager. A preview is shown in the top section.
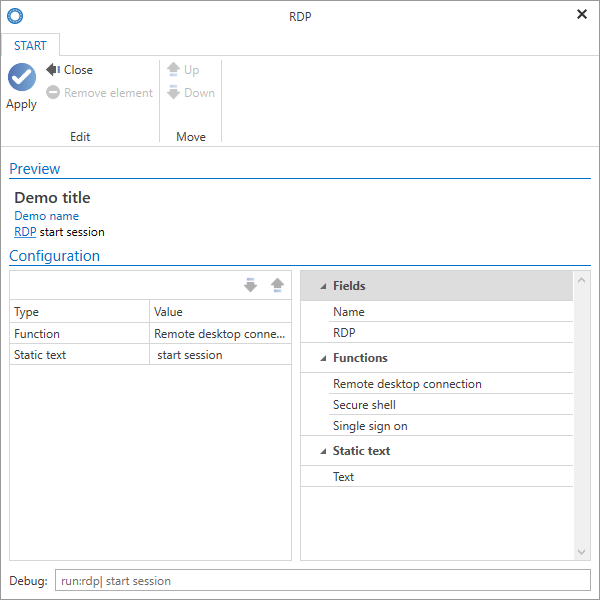
The info field for the form is now updated. It is now possible to start the RDP session directly in the RDP session.
Hint
The forms module is based on the WebClient module of the same name. Both modules have a different scope and design but are almost identical to use.
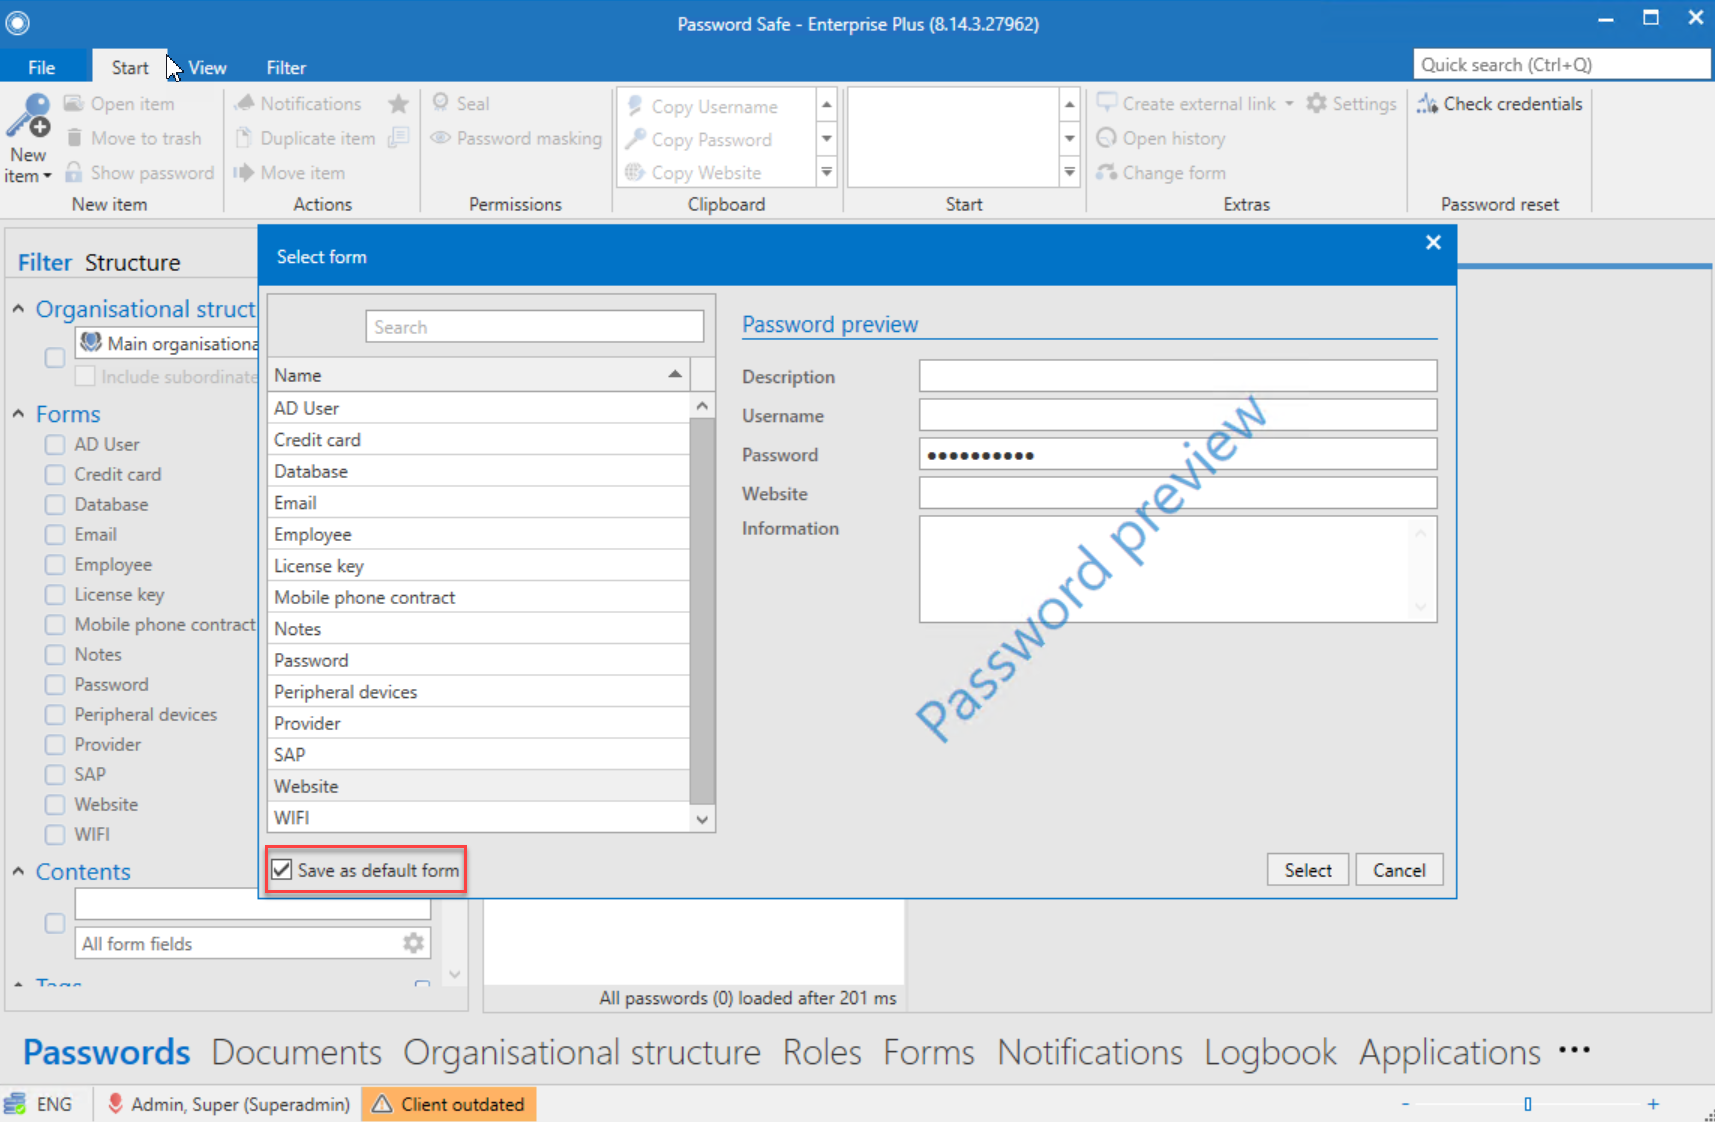
Standard form⚓︎
There are two possible ways to define a standard form.
Via the “standard form” user setting⚓︎
Via the form selection⚓︎
Created: 2022-09-05